So you’ve harvested a beautiful buck, and now the real work begins. Whether you’re a seasoned hunter or breaking down your first deer in the garage, the right deer processing tools can mean the difference between a freezer full of perfectly trimmed cuts and a frustrating, messy afternoon. Field-to-table butchering is part craft, part science, and entirely dependent on having the proper gear within arm’s reach.
What Tools Do You Need to Process a Deer?
To process a deer, you need a sharp boning knife, a skinning knife, a bone saw, a gambrel and hoist, a meat grinder, cutting boards, vacuum sealer, and game bags. These core tools cover skinning, quartering, deboning, grinding, and packaging your venison from field to freezer.
The Field Dressing Essentials
Before you even think about hanging the deer, you need to handle the field dressing. This stage happens in the woods, often in less-than-ideal conditions, so compact and reliable gear is non-negotiable.
- Gut hook knife: Designed to open the abdominal cavity without puncturing organs.
- Fixed-blade hunting knife: Your workhorse for the initial cuts and detail work.
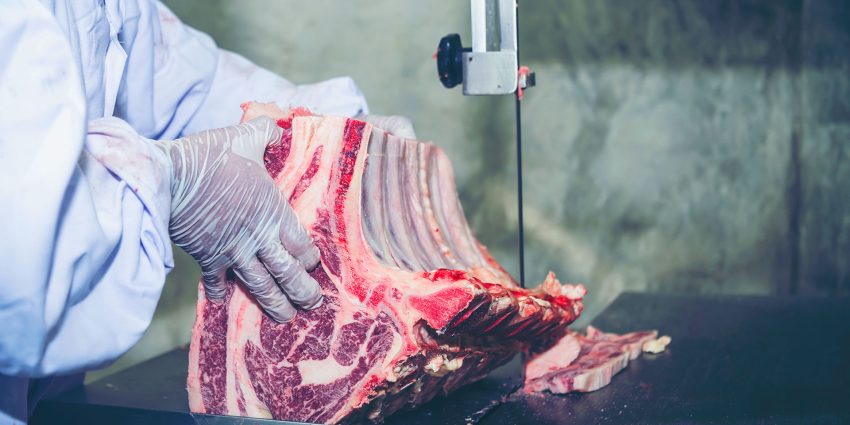
- Nitrile gloves: Keeps things sanitary and protects against any potential pathogens.
- Bone saw or pelvic saw: Helpful for splitting the pelvis when needed.
- Game bags: Breathable cotton or synthetic bags protect meat from dirt and insects on the pack out.
Why a Quality Knife Matters Here
A dull blade is dangerous. Period. When you’re working blind inside a body cavity, a knife that requires excessive force is far more likely to slip and cut you than a razor-sharp one. Invest in good steel and learn to sharpen it properly.
Hanging and Skinning Gear
Once you’re back at camp or in the garage, hanging the carcass makes every subsequent step easier. Gravity becomes your assistant, and you free up both hands for precision work.
Gambrel and Hoist System
A sturdy gambrel rated for at least 500 pounds, paired with a hand-cranked or electric hoist, lets you raise and lower the carcass to a comfortable working height. Your back will thank you.
Skinning Knife
Look for a blade with a wide, curved belly. The shape encourages slicing motions that separate hide from muscle without nicking the meat underneath.
Butchering and Deboning Tools
This is where the artistry of meat cutting really shines. The goal is to break the carcass into primal cuts, then refine those into steaks, roasts, and trim for grinding.
Knives You Cannot Skip
- Boning knife (6 inch flexible) — Slips between bone and muscle with surgical precision.
- Cimeter or breaking knife — A longer blade for slicing through larger muscle groups and creating steaks.
- Paring knife — Handy for trimming silver skin and fine detail work.
Saws and Cleavers
For splitting the spine, cutting through ribs, or sectioning shanks for osso buco, a dedicated meat saw beats any kitchen tool. A heavy cleaver also earns its place for chopping through smaller bones quickly.
If you want a deeper look at gear that has earned a reputation among generations of hunters and butchers, this rundown of proven tools highlights designs that simply work, year after year.
Grinding, Stuffing, and Sausage Making
Half the fun of processing your own venison is turning trim into burger, breakfast sausage, snack sticks, and summer sausage. This requires a different category of equipment.
- Meat grinder — Electric models with at least a #12 head and 1 horsepower handle deer-sized batches without bogging down.
- Stainless steel grinding plates — Have a coarse and fine plate at minimum.
- Sausage stuffer — A vertical, manual stuffer with a 5 to 15 pound capacity gives you control that grinder attachments cannot match.
- Mixing tub — Large food-grade tubs for blending seasonings into ground meat evenly.
- Casings — Natural hog, collagen, or fibrous depending on the sausage style.
Cutting Surfaces and Sanitation
The surface you work on matters as much as the blades you use. Cross-contamination, dull edges from improper cutting boards, and poor cleanup all start here.
Workspace Must-Haves
- HDPE or wood butcher block: Easy on knife edges, easy to sanitize.
- Stainless steel work tables: Non-porous and built for serious processing.
- Food-safe sanitizer: Diluted bleach or commercial sanitizer for surfaces between steps.
- Plenty of clean towels and paper towels: You will use more than you expect.
Packaging for the Long Haul
All that effort means nothing if your venison gets freezer burned in three months. Proper packaging extends shelf life to a year or longer.
- Vacuum sealer: Removes air entirely and creates a tight barrier. Chamber sealers handle moisture better than external models.
- Freezer paper and tape: The traditional method still works for those who prefer it.
- Permanent marker: Label every package with cut and date. You will forget otherwise.
- Butcher twine: Useful for tying roasts and certain sausages.
Sharpening and Maintenance Tools
A knife is only as good as its edge. Keeping your blades sharp throughout a long processing session is the mark of someone who knows what they’re doing.
- Honing steel: Realigns the edge between cuts.
- Whetstone set: For periodic full sharpening, usually 1000 and 6000 grit.
- Electric sharpener: Convenient for those who want speed over tradition.
Frequently Asked Questions
How much does it cost to set up a home deer processing station?
A solid starter kit runs between $300 and $600, covering knives, a gambrel, a basic grinder, and a vacuum sealer. Upgrading to commercial-grade gear can push the investment to $1,500 or more, but the equipment lasts decades.
Can I process a deer without a meat grinder?
Absolutely. You can take trim to a local butcher for grinding, or stick to whole-muscle cuts like steaks, roasts, and stew meat. A grinder simply expands what you can make at home.
What is the best knife for skinning a deer?
A drop-point or curved skinning knife with a 3 to 4 inch blade made from high-carbon steel works best. The curved belly separates hide from meat efficiently without piercing the carcass.
How long should it take to process a deer?
An experienced processor can break down a deer in 2 to 4 hours from skinning to packaging. First-timers should plan on 6 to 8 hours, especially if grinding and making sausage.
Do I need refrigeration during processing?
Yes. Meat should stay below 40°F during processing. If temperatures climb, work in smaller batches and return trim to a cooler or refrigerator between stages.
Final Thoughts
Building out a complete kit of deer processing tools is an investment that pays dividends every season. Start with quality knives, add a sturdy hanging setup, then expand into grinding and packaging gear as your confidence grows. Skip the bargain bin on anything that touches an edge or holds weight. Buy once, cry once, and process venison for the rest of your hunting career. The meat you take home is the reward for everything that happened in the field. Treat it with the respect it deserves, and the tools will pay for themselves many times over.